Posted on

The Complete Guide to Organising Dental Burs: How the RotaSystem Eliminates Ordering Errors, Saves Time and Creates Complete Bur Control

Introduction

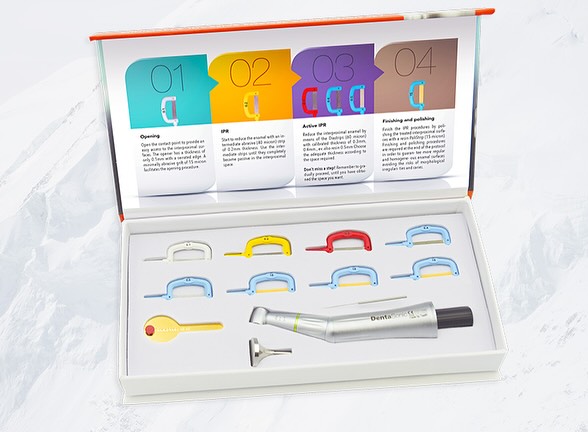
Every dentist understands the importance of selecting the correct dental bur. Whether preparing a crown, removing caries, refining a composite restoration, placing veneers, adjusting zirconia, or polishing ceramic restorations, the right bur can significantly influence efficiency, clinical outcomes, and patient experience.

However, while many clinicians carefully select the burs they use, far fewer practices have an effective system for organising, storing and reordering them.

Missing burs, incorrect reorders, unidentified instruments, cluttered bur stands and wasted surgery time are common frustrations in modern dentistry. In busy dental practices, these seemingly small issues accumulate to create significant costs throughout the year.

This is precisely why Crown Dental Burs developed the RotaSystem.

The RotaSystem is a simple yet highly effective dental bur organisation and inventory management solution designed to eliminate confusion, reduce ordering errors, improve stock control and ensure every clinician always has access to the burs they need.

In this article, we’ll explore why organising dental burs matters, the challenges faced by many practices, and how the RotaSystem provides a practical solution that saves both time and money.

Why Dental Bur Organisation Matters

Dental burs are among the most frequently used instruments in any dental practice.

Most clinicians use dozens of different burs every week, including:

  • Crown preparation burs
  • Cavity preparation burs
  • Diamond burs
  • Tungsten carbide burs
  • Endodontic burs
  • Surgical burs
  • Composite finishing burs
  • Ceramic polishing systems
  • Veneer preparation burs
  • Crown removal burs
  • Implant burs

As practices expand and multiple clinicians share surgeries, the challenge of maintaining organisation becomes increasingly difficult.

Common issues include:

Lost Burs

Many practices discover burs have gone missing between surgeries, sterilisation and storage.

Incorrect Reordering

Staff often attempt to reorder burs using descriptions such as:

  • “The green one”
  • “The football shaped bur”
  • “The crown prep bur”
  • “The diamond with the red ring”

Unfortunately, multiple burs fit these descriptions.

The result?

The wrong bur arrives, the clinician becomes frustrated, and the correct bur must be ordered again.

Excess Stock

Many practices over-order because they don’t know what inventory already exists.

Stock Shortages

Equally problematic is running out of a critical bur before an important treatment session.

Wasted Clinical Time

Even spending two minutes searching for a bur before every procedure can cost hours of productivity every month.

The Hidden Cost of Poor Bur Management

Many dental practices underestimate the financial impact of poor organisation.

Consider a practice with six clinicians.

If each clinician spends just five minutes daily searching for burs, identifying burs or requesting replacements:

5 minutes × 6 clinicians = 30 minutes daily

Over a year this can exceed 120 hours of lost clinical productivity.

That does not include:

  • Incorrect orders
  • Emergency shipping costs
  • Duplicate stock
  • Wasted staff time
  • Treatment delays

The true cost often reaches thousands of pounds annually.

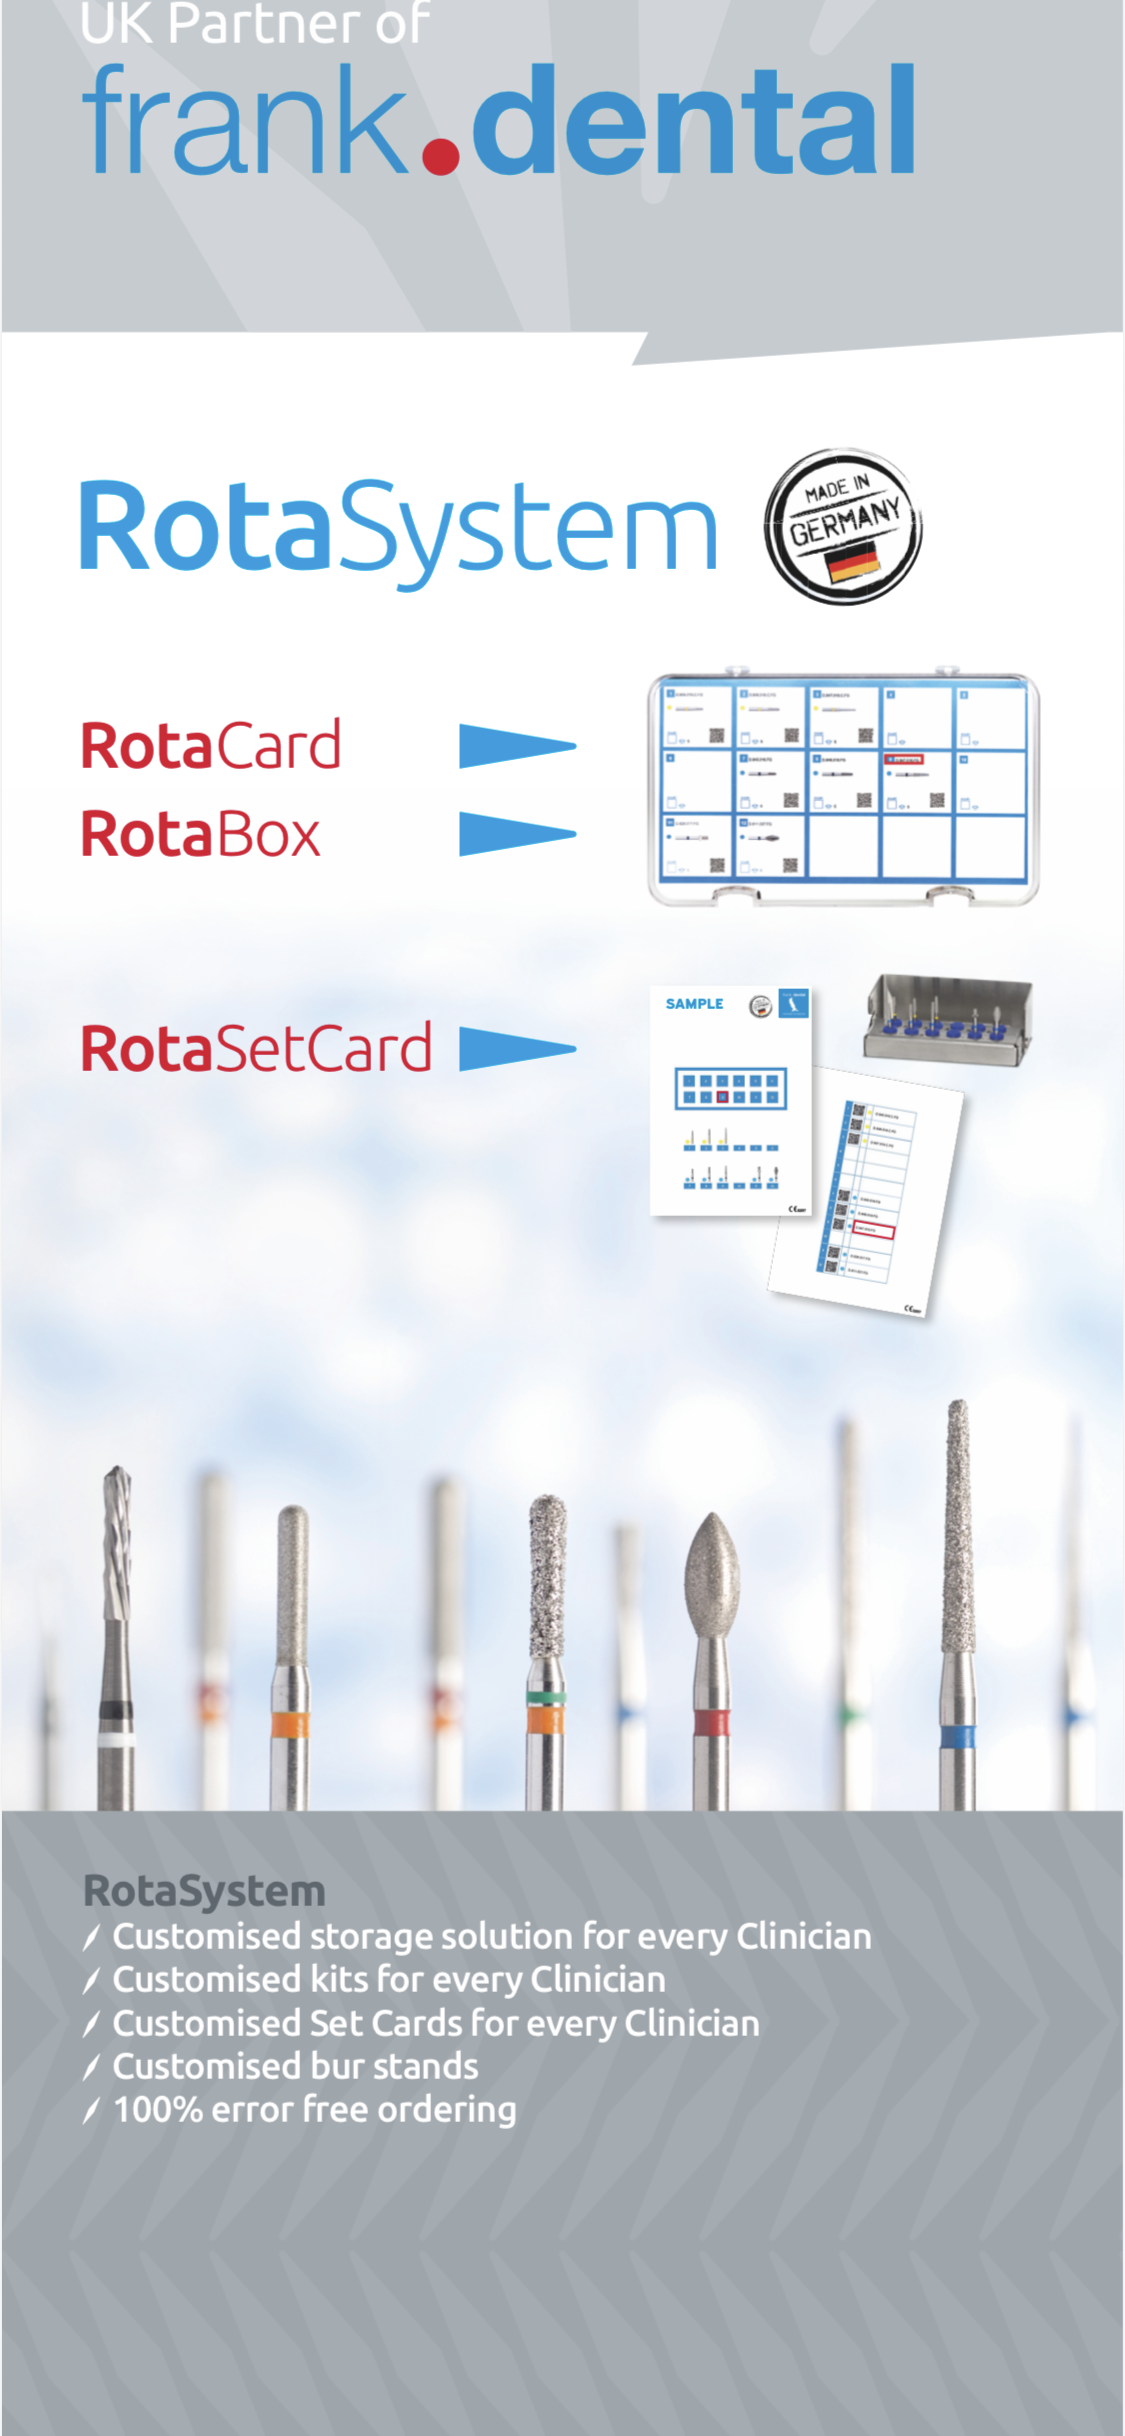
Introducing the RotaSystem

The RotaSystem was created to solve these challenges.

Rather than relying on memory, handwritten lists or photographs, the system introduces a simple numbering process that makes identification and reordering effortless.

The concept is straightforward:

Every bur has a unique number.

Every location has a unique number.

Every reorder references a unique number.

No confusion.

No guesswork.

No errors.

How the RotaSystem Works

Step 1: Create Your Ideal Bur Kit

Every clinician is different.

A restorative dentist may prefer one crown preparation bur while another chooses a completely different shape.

The RotaSystem allows clinicians to build a customised bur kit containing their preferred instruments.

This can include:

  • Crown preparation burs
  • Veneer burs
  • Composite finishing burs
  • Endodontic burs
  • Surgical burs
  • Implant burs
  • Crown removal burs

Each bur is allocated a dedicated position.

Step 2: Number Every Bur

Each bur position is assigned a specific reference number.

For example:

Position 1 = Crown Preparation Bur

Position 2 = Depth Cutter

Position 3 = Finishing Bur

Position 4 = Football Bur

Position 5 = Crown Removal Bur

The clinician no longer needs to remember the manufacturer’s reference number.

They simply identify the position.

Step 3: Use the RotaCard

The RotaCard acts as the master reference guide.

Every bur position is clearly documented alongside the manufacturer’s code.

When a bur needs replacing, staff simply reference the position number.

No searching through catalogues.

No deciphering worn laser markings.

No uncertainty.

Step 4: Store with the RotaBox

The RotaBox provides organised storage for replacement burs.

Each compartment corresponds directly with the RotaCard and bur stand.

This means replacement stock remains organised and easy to locate.

The entire system works together seamlessly.

Eliminating Ordering Errors

One of the biggest advantages of the RotaSystem is the dramatic reduction in ordering mistakes.

Traditionally, a clinician might ask:

“Can you order the red band diamond bur I use for crown preps?”

The problem is there may be dozens of red band diamond burs available.

With the RotaSystem the request becomes:

“Please order position 6.”

That’s it.

No ambiguity.

No confusion.

No incorrect deliveries.

The exact bur is reordered every time.

Perfect for Multi-Clinician Practices

As dental groups continue to grow, standardisation becomes increasingly important.

The RotaSystem allows every clinician to have:

  • Their own customised kit
  • Their own numbering system
  • Their own bur preferences
  • Their own replacement stock

Clinicians can move between surgeries while maintaining consistency.

Nurses can quickly identify missing burs.

Practice managers can streamline procurement.

The result is improved efficiency across the entire practice.

Simplifying Dental Bur Inventory Management

Stock control is one of the biggest challenges in dentistry.

Many practices carry hundreds of different burs.

Without a structured inventory system it becomes difficult to know:

  • What stock is available
  • What stock is low
  • Which burs are most frequently used
  • Which products are no longer required

The RotaSystem provides visibility and control.

Replacement stock can be monitored by numbered position rather than complicated manufacturer codes.

This simplifies inventory management for both clinical and administrative teams.

Custom Engraved Bur Stands

Every RotaSystem bur stand can be customised.

Practices can include:

  • Practice name
  • Clinician name
  • Surgery number
  • Department identification
  • Corporate branding

This helps ensure bur kits are returned to the correct clinician after sterilisation.

For larger practices and dental groups, this feature alone can save significant time.

Supporting Clinical Consistency

Consistency is essential in dentistry.

Patients expect predictable outcomes.

Clinicians expect reliable instruments.

The RotaSystem supports consistency by ensuring clinicians always have access to the exact burs they prefer.

Instead of substituting burs because a favourite instrument cannot be found, clinicians can maintain their established workflows.

This improves efficiency and supports predictable clinical outcomes.

Reducing Stress for Dental Nurses

Dental nurses often carry responsibility for:

  • Bur management
  • Sterilisation
  • Stock ordering
  • Surgery setup

The RotaSystem removes much of the uncertainty.

Instead of trying to identify burs by shape or colour, nurses simply reference numbered positions.

This reduces stress and improves confidence when managing inventory.

The Ideal Solution for New Associates

Associate dentists frequently spend time building their preferred bur kits.

The RotaSystem allows clinicians to create a personalised setup that can move with them throughout their career.

Every bur remains documented.

Every replacement remains straightforward.

Every procedure becomes more predictable.

Saving Time Every Day

The beauty of the RotaSystem lies in its simplicity.

Small time savings accumulate quickly.

Instead of:

  • Searching for burs
  • Identifying burs
  • Ordering incorrect burs
  • Correcting mistakes

Clinicians simply focus on patient care.

Even saving a few minutes per day can translate into dozens of productive hours annually.

Why Simplicity Wins

Many inventory systems become overly complicated.

They require software.

Training.

Data entry.

Ongoing maintenance.

The RotaSystem succeeds because it remains simple.

It works immediately.

No software required.

No subscriptions.

No complicated implementation.

Just a logical, organised method of managing dental burs.

Future-Proofing Your Practice

As practices grow, systems become increasingly important.

The practices that scale successfully are those that remove unnecessary inefficiencies.

The RotaSystem creates a repeatable process that supports:

  • Better stock control
  • Reduced waste
  • Faster ordering
  • Improved organisation
  • Greater clinical consistency

It is a small change that can create a significant impact.

Conclusion

Dental burs are essential to almost every clinical procedure performed in modern dentistry.

Yet many practices still rely on memory, handwritten notes and visual identification when managing them.

This often leads to confusion, wasted time and costly ordering mistakes.

The RotaSystem was developed to solve these challenges through a simple, logical and highly effective approach.

By combining numbered bur stands, RotaCards, RotaBoxes and customised clinician kits, the system eliminates guesswork and provides complete control over dental bur organisation.

Whether you are an individual clinician, independent practice or large dental group, the RotaSystem helps ensure the right bur is always available, easy to identify and simple to reorder.

The result is improved efficiency, reduced costs, better stock control and a more organised dental practice.

If you’re looking for a smarter way to manage dental burs, the RotaSystem offers the simplest solution available.

Posted on

Why Refining a Crown Preparation with a Fine Diamond Bur Matters


Why Refining a Crown Preparation with a Fine Diamond Bur Matters: What Happens to Tooth Structure After Using a Coarse Diamond Bur?

Introduction

When preparing a tooth for a crown, most dentists focus on achieving the correct reduction, margin design and path of insertion. However, one critical step is often overlooked: refining the preparation with a fine diamond bur after initial reduction.

A common question asked during restorative training courses is:

“If my crown preparation has the correct shape, why does it matter whether I finish with a coarse diamond or a fine diamond?”

The answer lies in what happens to enamel and dentine at a microscopic level.

To the naked eye, a crown preparation created with a coarse green band diamond bur may appear perfectly smooth. Under magnification, however, the surface tells a very different story.

The difference between a preparation finished with a coarse diamond and one refined with a fine diamond can influence:

  • Digital scan accuracy
  • Impression quality
  • Crown fit
  • Margin readability
  • Cement thickness
  • Stress distribution
  • Ceramic adaptation
  • Long-term restoration success

Understanding these differences helps dentists produce more predictable crown preparations and ultimately better restorations.


Understanding Diamond Bur Grit Sizes

Before discussing crown preparations, it is important to understand what grit size means.

Diamond burs cut through abrasion.

The larger the diamond particles, the deeper the scratches they create within enamel and dentine.

Typical grit classifications include:

Green Band Diamond Burs

Coarse grit

107–181 microns

Designed primarily for:

  • Rapid tooth reduction
  • Crown preparation
  • Occlusal reduction
  • Bulk enamel removal

Red Band Diamond Burs

Fine grit

27–76 microns

Designed for:

  • Crown preparation refinement
  • Margin finishing
  • Veneer preparation finishing
  • Digital scanning preparation
  • Final preparation smoothing

The difference between these two grit sizes is substantial.

A green band bur can contain diamond particles over twice the size of many red band burs.

This directly affects the preparation surface.


What Happens When a Coarse Diamond Bur Contacts Enamel?

Enamel is the hardest tissue in the human body.

Although it appears smooth clinically, enamel consists of millions of enamel prisms arranged in a highly organised structure.

When a coarse diamond bur contacts enamel, it removes tooth structure aggressively through abrasion.

At a microscopic level, the large diamond particles create:

  • Deep grooves
  • Micro-scratches
  • Irregular peaks
  • Surface ridges
  • Abrasion channels

The process is extremely efficient for reduction but not ideal for finishing.

Imagine using 40-grit sandpaper on a piece of wood.

The wood may appear smooth from a distance but under magnification significant scratches remain.

A coarse diamond bur produces a similar effect on enamel.


What Happens Within Dentine?

Dentine is significantly softer than enamel.

As a result, coarse diamonds can produce even more pronounced surface irregularities.

Microscopically, coarse diamonds create:

  • Deep abrasion tracks
  • Torn dentinal surfaces
  • Open dentinal tubules
  • Surface roughness
  • Micro-undercuts

These irregularities may not be visible clinically but can influence restoration fit.


The Myth That Rougher Is Better

Some clinicians assume that rougher preparations improve crown retention.

Historically this concept emerged from conventional crown and bridge techniques where mechanical retention was heavily relied upon.

However, modern restorative dentistry has changed dramatically.

Today’s restorations depend upon:

  • Precision fit
  • Digital scanning
  • Modern luting cements
  • CAD/CAM manufacturing
  • Adhesive technologies

Excessive surface roughness no longer provides the advantages many clinicians believe it does.

In fact, excessive roughness can create new problems.


How Coarse Diamonds Affect Crown Margins

The crown margin is arguably the most important part of any preparation.

It determines:

  • Restoration fit
  • Marginal adaptation
  • Cement seal
  • Periodontal response

When a margin is created solely with a coarse diamond bur, the edge often contains microscopic irregularities.

These can include:

  • Small notches
  • Micro-serrations
  • Irregular transitions
  • Uneven finish lines

Although difficult to see clinically, scanners and laboratories frequently detect these imperfections.

This may lead to:

  • Margin interpretation errors
  • Crown seating discrepancies
  • Increased adjustment requirements

Digital Dentistry Has Changed the Rules

The rise of intraoral scanners has fundamentally altered crown preparation requirements.

Scanners capture reflected light from preparation surfaces.

The smoother the preparation surface, the easier it becomes for software to identify preparation margins accurately.

Coarse diamond scratches can create:

  • Scan noise
  • Margin ambiguity
  • Surface artefacts
  • Data inaccuracies

Refining with a fine diamond bur significantly reduces these problems.


How Fine Diamonds Improve Scan Accuracy

Red band finishing diamonds create much shallower scratches.

Rather than aggressively removing tooth structure, they smooth and refine the preparation surface.

Benefits include:

  • Improved scanner recognition
  • Better margin detection
  • More accurate digital models
  • Reduced scan artefacts

For dentists using digital workflows, refinement is no longer optional—it is an important step in achieving predictable results.


Improved Impression Accuracy

Although digital scanning continues to grow, many practices still use conventional impressions.

A smoother preparation offers advantages here too.

Fine diamonds reduce:

  • Surface irregularities
  • Impression tearing
  • Air entrapment
  • Margin distortion

The result is a cleaner and more accurate impression.


Crown Fit and Surface Roughness

One of the most misunderstood concepts in crown preparation is the relationship between surface roughness and crown fit.

Many dentists assume that because cements occupy space, surface texture is irrelevant.

However, every peak and valley created by a coarse diamond contributes to surface irregularity.

This can influence:

  • Internal adaptation
  • Seating resistance
  • Cement thickness consistency

Although modern cements can compensate for small variations, smoother preparations generally provide more predictable adaptation.


Why Ceramic Crowns Prefer Smooth Preparations

Ceramic materials behave differently from metals.

Zirconia, lithium disilicate and feldspathic ceramics all benefit from uniform support.

Sharp surface irregularities may create localised stress concentrations.

A smoother preparation promotes:

  • Uniform ceramic thickness
  • Improved support
  • Better stress distribution

This becomes particularly important for thin ceramic margins.


Surface Stress Concentration

Every scratch created by a coarse diamond bur represents a potential stress concentrator.

While most will never create clinical problems, the principle remains important.

Stress tends to concentrate around irregularities.

By refining the preparation surface, dentists reduce:

  • Surface defects
  • Irregular transitions
  • Abrasion grooves

This creates a more favourable foundation for the restoration.


The Difference Under Magnification

If a crown preparation created with a green diamond was viewed under high magnification, the surface would resemble a landscape filled with:

  • Valleys
  • Peaks
  • Ridges
  • Abrasion channels

A preparation subsequently refined with a red diamond appears dramatically different.

The surface becomes:

  • More uniform
  • More consistent
  • More polished
  • More readable

Although both preparations may appear similar clinically, they are very different microscopically.


Why Laboratories Prefer Refined Preparations

Dental technicians frequently report that refined preparations are easier to work with.

Advantages include:

  • Better margin visibility
  • Reduced ambiguity
  • Improved restoration design
  • More predictable fit

A clearly defined margin helps technicians fabricate restorations with greater confidence.


Green Diamond First, Red Diamond Second

The ideal protocol is not replacing coarse diamonds.

Coarse diamonds remain essential.

Their purpose is efficient reduction.

A typical sequence is:

Step 1

Green band diamond

Perform:

  • Occlusal reduction
  • Axial reduction
  • Margin creation

Step 2

Red band diamond

Perform:

  • Margin refinement
  • Surface smoothing
  • Final finishing

This combines efficiency with accuracy.


Common Mistakes Made by Dentists

Finishing with the Same Bur Used for Reduction

Once a coarse diamond becomes loaded or worn, some clinicians continue using it for finishing.

This often creates inconsistent preparation surfaces.

Ignoring Margin Refinement

Many preparations appear complete but contain rough finish lines.

These should always be refined.

Excessive Pressure

Heavy pressure increases scratch depth.

Allow the diamonds to perform the cutting.

Not Reviewing Under Magnification

Magnification frequently reveals imperfections invisible to the naked eye.


Which Crown Preparations Benefit Most?

All crown preparations benefit from refinement.

However, the greatest advantages are seen with:

E.max Crowns

Lithium disilicate restorations demand precise margins.

Anterior Ceramic Crowns

Aesthetic success depends heavily on marginal adaptation.

Veneers

Margin accuracy is critical.

Digital Dentistry Cases

Scanning accuracy improves significantly with smoother preparations.


Does Refinement Remove More Tooth Structure?

A common concern is that refinement may over-prepare the tooth.

In reality, fine diamonds remove minimal tooth structure when used correctly.

Their purpose is not additional reduction.

Their purpose is surface refinement.

The amount of tooth structure removed is often negligible compared with the initial preparation.


The Clinical Benefits of Refinement

Refining a crown preparation with a fine red band diamond bur may provide:

  • Improved margin definition
  • Better scanner recognition
  • Enhanced impression accuracy
  • More readable preparations
  • Better crown adaptation
  • Reduced adjustment requirements
  • Improved laboratory communication
  • Greater restorative predictability

Conclusion

Coarse green band diamond burs remain essential for efficient crown preparation. Their ability to rapidly remove enamel and dentine makes them indispensable for occlusal reduction, axial reduction and margin creation.

However, they were never designed to be finishing instruments.

At a microscopic level, coarse diamonds leave behind deep scratches, grooves and surface irregularities within enamel and dentine. While these may not be obvious clinically, they can influence scan quality, impression accuracy, margin readability and restoration fit.

Refining the preparation with a fine red band diamond bur transforms the preparation surface. The finish line becomes clearer, the surface becomes smoother and both scanners and laboratories can interpret the preparation more accurately.

For modern crown preparation—particularly in the era of digital dentistry—the most predictable workflow remains simple:

Prepare with a coarse diamond. Refine with a fine diamond.

This small additional step can significantly improve the quality, accuracy and predictability of indirect restorations while requiring only a few extra seconds of clinical time.

Posted on

Best Dental Burs for Crown Preparation

Best Dental Burs for Crown Preparation: Understanding Chamfers, Shoulders and Modern Ceramic Restorations

Choosing the correct crown preparation bur is one of the most important decisions in restorative dentistry.

The shape of the bur determines the shape of the preparation.

The shape of the preparation determines how well the restoration performs.

Crown Preparation Philosophy

Many newly qualified dentists focus on the restoration material.

Experienced dentists focus on the preparation first.

The preparation must support the restorative material.

Different materials require different margin designs.

Chamfer Burs

Examples:

  • Frank Dental Tapered Chamfer D.856
  • Frank Dental Parallel Chamfer D.881

A chamfer creates a rounded concave margin.

Best suited for:

  • Monolithic zirconia crowns
  • Metal crowns
  • PFM crowns

Advantages:

  • Conservative tooth reduction
  • Excellent marginal integrity
  • Reduced risk of over-preparation

Shoulder Burs

Examples:

  • Frank Dental D.845KR
  • Frank Dental D.959KR

A shoulder creates a flat ledge.

Best suited for:

  • E.max crowns
  • Lithium disilicate restorations
  • Porcelain restorations
  • Aesthetic anterior crowns

Advantages:

  • Supports brittle ceramics
  • Reduces edge chipping
  • Creates uniform ceramic thickness

Parallel Chamfer Burs

Parallel chamfer burs provide highly controlled preparations.

Advantages:

  • Uniform reduction
  • Excellent scanner readability
  • Consistent crown fit
  • Predictable preparation geometry

Why Margin Design Matters

Incorrect margin design is one of the leading causes of restoration failure.

Common problems include:

  • Ceramic chipping
  • Crown fracture
  • Open margins
  • Poor restoration fit

Selecting the correct crown preparation bur from the start significantly improves clinical outcomes.

Recommended Crown Preparation Burs

For Zirconia:

  • Tapered Chamfer Round End
  • Parallel Chamfer

For E.max:

  • Tapered Shoulder Round Edge
  • Shoulder Preparation Burs

For Veneers:

  • Depth Cutters
  • Veneer Reduction Burs
  • Fine Finishing Diamonds

Understanding how bur design influences restoration success is essential for every modern restorative dentist.

For a complete overview of all bur shapes and their applications, read our Complete Guide to Dental Burs.

Posted on

Diamond Burs v Tungsten carbide Burs

Diamond Burs vs Tungsten Carbide Burs: Which Dental Bur Should You Use?

One of the biggest sources of confusion for newly qualified dentists is deciding whether to use a diamond bur or a tungsten carbide bur.

Although both are designed to remove tooth structure and restorative materials, they cut in completely different ways.

How Diamond Burs Work

Diamond burs remove material through abrasion.

Thousands of diamond particles are bonded to the surface of the bur.

As the bur rotates, the diamonds grind away enamel, dentine or restorative material.

Advantages:

  • Excellent enamel cutting
  • Ideal for crown preparation
  • Efficient ceramic reduction
  • Long lifespan
  • Predictable preparation geometry

Best used for:

  • Crown preparations
  • Veneer preparations
  • Ceramic adjustments
  • Zirconia cutting

How Carbide Burs Work

Carbide burs cut using blades.

Rather than grinding material away, they slice through it.

Advantages:

  • Faster dentine cutting
  • Less heat generation
  • Excellent caries removal
  • Smooth composite finishing
  • Efficient amalgam removal

Best used for:

  • Cavity preparation
  • Composite finishing
  • Crown removal
  • Endodontic access
  • Surgical procedures

Which Produces a Better Surface Finish?

For crown preparations:

Diamond burs produce superior preparation geometry.

For composite restorations:

Carbide finishers generally produce smoother surfaces.

A 30-blade carbide finishing bur can produce a surface finish approaching 0.3 microns, significantly smoother than most finishing diamonds.

The Ideal Combination

Most experienced restorative dentists use both:

Diamond burs for preparation.

Carbide burs for finishing.

This provides the best balance between cutting efficiency and restoration quality.

Understanding when to use each bur is one of the fastest ways to improve restorative outcomes.

Posted on

Dental Bur Colour Guide

Dental Bur Colour Guide: What Do Black, Green, Blue, Red and Yellow Rings Mean?

One of the most common questions asked by newly qualified dentists is:

“What do the different coloured bands on dental burs mean?”

Whether you are carrying out a crown preparation, veneer preparation, composite finishing procedure or ceramic adjustment, understanding diamond bur grit sizes is essential for achieving predictable clinical results.

The coloured ring found on a diamond bur indicates the grit size of the diamond particles bonded to the surface of the bur.

The grit determines how aggressively the bur cuts and the quality of surface finish left behind.

Black Ring Diamond Burs

Black ring burs are classified as super coarse.

Typical grit size:

151-213 microns

Applications include:

  • Rapid crown removal
  • Heavy tooth reduction
  • Bulk ceramic reduction
  • Large amalgam removal
  • Gross contouring

Advantages:

  • Fast cutting
  • Reduced chair time
  • Efficient material removal

Disadvantages:

  • Rough surface finish
  • Greater heat generation
  • Requires refinement with finer burs

Green Ring Diamond Burs

Green ring burs are coarse diamonds.

Typical grit size:

107-181 microns

Applications include:

  • Crown preparation
  • Zirconia reduction
  • Occlusal reduction
  • Bulk enamel reduction

These are among the most commonly used crown preparation burs.

Blue Ring Diamond Burs

Blue ring burs represent medium grit diamonds.

Typical grit size:

66-126 microns

These burs are often considered the ideal balance between cutting efficiency and surface quality.

Applications:

  • Crown preparation
  • Veneer preparation
  • Onlay preparation
  • Finishing reductions

Many dentists complete the majority of their preparation using blue grit burs.

Red Ring Diamond Burs

Red ring burs are fine diamonds.

Typical grit size:

27-76 microns

Applications:

  • Margin refinement
  • Crown preparation finishing
  • Veneer finishing
  • Ceramic adjustments

Red grit burs create smoother preparation surfaces which can improve scanner accuracy.

Yellow Ring Diamond Burs

Yellow ring burs are extra-fine finishing diamonds.

Typical grit size:

10-36 microns

Applications:

  • Final preparation refinement
  • Ceramic finishing
  • Composite contouring
  • Margin polishing

These burs create the smoothest preparation surfaces before impression taking or scanning.

Which Grit Should You Use?

As a general rule:

Green = Reduction

Blue = Preparation

Red = Refinement

Yellow = Final Finishing

Understanding this simple progression can significantly improve preparation quality and restorative fit.

For more information about selecting the correct bur shape, read our Complete Guide to Dental Burs.

Posted on

A helpful Guide to Dental Burs

A Helpful Guide to Dental Burs for Newly Qualified Dentists: Understanding Bur Shapes, Uses and Clinical Applications

Introduction

One of the most overlooked skills in dentistry is understanding dental burs.

Every day, dentists use dental burs to prepare cavities, remove caries, shape composite restorations, prepare crowns, adjust ceramics and remove existing restorations. Yet many newly qualified dentists leave university with only a basic understanding of why different bur shapes exist and when they should be used.

Many dentists know which bur to pick up because it was recommended by a trainer or because it is included within a bur kit. However, understanding the reason behind bur design is what separates a competent clinician from an efficient and predictable clinician.

The reality is simple:

The shape of the bur largely determines the shape of the preparation.

If you understand what preparation geometry a restoration requires, selecting the correct bur becomes much easier.

This guide explains the most common dental bur shapes, their uses, advantages and clinical applications to help newly qualified dentists build confidence and improve restorative outcomes.


Why Are There So Many Different Dental Burs?

A common question from newly qualified dentists is:

“Why are there hundreds of different dental burs available?”

The answer is because different restorative materials require different preparation designs.

A zirconia crown requires a different preparation from an E.max crown.

A composite restoration requires a different preparation from an amalgam restoration.

A veneer requires a different preparation from a full coverage crown.

Each bur has been designed to create a specific shape, depth or margin design.

The easiest way to understand dental burs is to stop thinking about the bur itself and start thinking about the preparation shape you need to create.


Understanding Diamond Burs vs Tungsten Carbide Burs

Before discussing individual bur shapes, it is important to understand the difference between diamond burs and carbide burs.

Diamond Burs

Diamond burs remove tooth structure through abrasion.

Thousands of diamond particles are bonded to the surface of the bur. As the bur rotates, these particles grind away enamel, dentine or restorative material.

Diamond burs are primarily used for:

  • Crown preparation
  • Veneer preparation
  • Ceramic adjustments
  • Zirconia reduction
  • Enamel reduction

Advantages include:

  • Excellent cutting efficiency in enamel
  • Smooth preparation surfaces
  • Long lifespan
  • Ideal for ceramic materials

Tungsten Carbide Burs

Carbide burs remove material through cutting rather than grinding.

The blades slice through tooth structure and restorative materials.

Common applications include:

  • Caries removal
  • Composite finishing
  • Crown removal
  • Amalgam removal
  • Endodontic access

Advantages include:

  • Fast cutting
  • Reduced heat generation
  • Excellent control
  • Superior composite finishing

A useful rule is:

Diamond burs prepare.

Carbide burs cut and finish.


Understanding Bur Numbering Systems

Many newly qualified dentists become confused by bur numbers.

For example:

  • D.801
  • D.830
  • D.835
  • D.845KR
  • D.856

The number usually relates to the bur shape rather than the diameter.

The final three numbers generally indicate the head diameter.

For example:

014 = 1.4mm

016 = 1.6mm

018 = 1.8mm

021 = 2.1mm

025 = 2.5mm

Understanding this makes selecting the correct bur much easier.


Round Dental Burs

What Is a Round Bur?

Round burs feature a spherical cutting head.

Examples include:

  • D.001
  • D.801
  • Round carbide burs

They are among the most versatile burs in dentistry.


Uses of Round Burs

Caries Removal

Round burs are excellent for removing infected dentine conservatively.

The spherical shape naturally follows carious lesions.

Endodontic Access

Round burs are often used to create initial access cavities.

Minimally Invasive Dentistry

Small round burs allow highly conservative cavity preparations.

Retention Grooves

Traditionally used to create mechanical retention.


Pear-Shaped Dental Burs

What Is a Pear Bur?

Pear burs feature a rounded cutting head which narrows towards the shank.

Examples include:

  • D.830
  • 330 carbide burs

Why Use a Pear Bur?

The shape naturally creates:

  • Rounded internal line angles
  • Conservative cavity walls
  • Stress-reducing preparation geometry

This is particularly beneficial for composite restorations.


Advantages of Pear Burs

Rounded internal line angles reduce stress concentration.

This decreases the risk of:

  • Composite fracture
  • Enamel cracking
  • Restoration failure

For many direct composite restorations, pear burs remain the preferred cavity preparation bur.


Straight Fissure Dental Burs

What Is a Straight Fissure Bur?

Straight fissure burs have parallel walls and a flat end.

Examples include:

  • D.835
  • Traditional fissure burs

Uses

Common applications include:

  • Cavity preparation
  • Access preparation
  • Crown sectioning
  • Core reduction

These burs naturally create:

  • Parallel walls
  • Flat floors
  • Box-shaped preparations

Straight Fissure Round End Burs

Examples:

  • D.835KR

These burs retain parallel sides but feature a rounded end.


Why Is This Important?

Sharp internal line angles create stress concentrations.

Rounded internal line angles:

  • Reduce fracture risk
  • Improve ceramic support
  • Improve restoration longevity

This is why many modern restorative dentists prefer round-ended fissure burs.


Tapered Fissure Burs

Unlike straight fissure burs, tapered fissure burs create converging walls.

Benefits include:

  • Improved path of insertion
  • Better seating of indirect restorations
  • Easier impression taking

These burs are often used during crown and onlay preparation.


Understanding Crown Preparation Burs

Crown preparation burs are designed to create specific margin designs.

Different restorative materials require different margins.

Understanding this relationship is critical.


Tapered Chamfer Burs

Examples:

  • Frank Dental D.856
  • Chamfer Round End

What Is a Chamfer?

A chamfer is a curved concave margin.

The bur naturally creates this shape.


Best Uses

  • Monolithic zirconia crowns
  • Gold crowns
  • PFM crowns

Advantages

  • Conservative tooth reduction
  • Excellent marginal integrity
  • Strong preparation design
  • Easy digital scanning

Parallel Chamfer Burs

Parallel chamfer burs create highly controlled chamfer margins.

These burs are increasingly popular for zirconia crown preparations.


Advantages

  • Uniform preparation depth
  • Predictable reduction
  • Excellent crown fit
  • Easy scanning

Many clinicians consider the parallel chamfer one of the most versatile crown preparation burs available.


Shoulder Preparation Burs

Examples:

  • D.845KR
  • D.959KR

What Is a Shoulder Margin?

A shoulder margin creates a flat ledge at the crown margin.

This provides support for brittle ceramics.


Best Applications

  • E.max crowns
  • Lithium disilicate restorations
  • Porcelain crowns
  • Aesthetic anterior crowns

Why Does E.max Need a Shoulder?

Lithium disilicate ceramics require sufficient thickness.

Without adequate support:

  • Edge chipping may occur
  • Crown fracture risk increases
  • Restoration longevity decreases

Shoulder burs provide the necessary ceramic support.


End Cutting Burs

Examples:

  • D.839

These burs cut only on the tip.


Uses

  • Flattening shoulder margins
  • Refining preparation floors
  • Correcting uneven reductions

They are particularly useful during final crown preparation refinement.


Veneer Preparation Burs

Modern veneer dentistry demands highly controlled tooth reduction.

The greatest risk is over-preparation.


Veneer Depth Cutters

Common depths include:

  • 0.3mm
  • 0.4mm
  • 0.5mm

These burs create depth grooves.


Benefits

  • Prevent over-reduction
  • Preserve enamel
  • Improve bond strength
  • Increase restoration longevity

Composite Finishing Burs

The quality of composite finishing often determines the quality of the restoration.

A beautifully placed composite can appear poor if improperly finished.


Flame Burs

Applications:

  • Emergence profiles
  • Composite contouring
  • Interproximal finishing

Needle Burs

Applications:

  • Contact point opening
  • Composite anatomy
  • Margin refinement

Needle burs are particularly useful for highly aesthetic anterior restorations.


Carbide Finishing Burs

Typical configurations include:

12-Blade

Used for contouring.

30-Blade

Used for ultra-fine finishing.

Many carbide finishers can create surface finishes approaching 0.3 microns.


Crown Removal Burs

Removing modern restorative materials requires specialised burs.

Using the wrong crown cutter dramatically increases chair time.


Zirconia Crown Cutters

Used for:

  • Monolithic zirconia crowns
  • Layered zirconia crowns

Designed to minimise heat generation.


PFM Crown Cutters

Used for:

  • Porcelain bonded to metal crowns
  • Metal restorations

Often incorporate tungsten carbide technology.


Surgical Burs

Surgical burs differ significantly from restorative burs.

Examples include:

  • Lindemann burs
  • Round surgical burs
  • Bone contouring burs

Applications:

  • Surgical extractions
  • Bone removal
  • Implant surgery
  • Alveoplasty

Understanding Diamond Bur Grits

Diamond grit influences both cutting speed and surface finish.

Black Ring

151-213 microns

Super coarse

Green Ring

107-181 microns

Coarse

Blue Ring

66-126 microns

Medium

Red Ring

27-76 microns

Fine

Yellow Ring

10-36 microns

Extra fine

Generally:

Green for reduction.

Blue for preparation.

Red for refinement.

Yellow for finishing.


Common Mistakes Made by Newly Qualified Dentists

Using One Bur for Everything

Every bur shape exists for a reason.

Using the correct instrument improves efficiency and quality.

Over-Preparation

Excessive reduction weakens teeth unnecessarily.

Depth cutters help prevent this.

Sharp Internal Angles

These increase stress concentration.

Rounded internal forms improve restoration longevity.

Incorrect Margin Selection

Not all materials require the same margin design.

Poor Composite Finishing

Finishing is just as important as placement.


Building Your First Bur Kit

For most newly qualified dentists, a simple kit should include:

Cavity Preparation

  • Round bur
  • Pear bur
  • Straight fissure round end

Crown Preparation

  • Tapered chamfer round end
  • Parallel chamfer
  • Tapered shoulder round edge
  • End cutting bur

Composite Finishing

  • Flame diamond
  • Needle diamond
  • 12-blade carbide
  • 30-blade carbide

Crown Removal

  • Zirconia cutter
  • PFM cutter

This combination will comfortably cover most restorative procedures.


Conclusion

Understanding dental burs is one of the most valuable clinical skills a newly qualified dentist can develop.

Every bur shape has been designed to create a specific preparation geometry. Once you understand this principle, selecting the correct bur becomes much simpler.

Rather than memorising hundreds of bur numbers, focus on understanding the restoration being placed and the preparation shape required to support it.

The correct dental bur will improve efficiency, increase restorative predictability, reduce chair time and ultimately help provide better outcomes for patients.

Whether you are preparing a simple composite restoration, an E.max veneer, a zirconia crown or removing an existing restoration, choosing the correct dental bur is the first step towards clinical success.

Posted on

Understanding Minimum Crown Preparation Depth for Modern Dental Crowns

Understanding Minimum Crown Preparation Depth for Modern Dental Crowns

Why Correct Depth Reduction Is Essential for Long-Term Crown Success

One of the most important factors in restorative dentistry is ensuring adequate tooth reduction during crown preparation. Whether preparing a tooth for a porcelain fused to metal (PFM) crown, zirconia crown, lithium disilicate restoration or full gold crown, the preparation depth directly affects the strength, fit, longevity and aesthetics of the final restoration.

Unfortunately, inadequate reduction remains one of the most common causes of crown failure.

Many clinicians understandably try to remain conservative during preparation to protect the pulp and preserve tooth structure. However, under-preparation can create serious restorative complications including:

  • Weak ceramic restorations
  • Fractured porcelain
  • Overcontoured crowns
  • Poor occlusion
  • Marginal failure
  • Cement washout
  • Poor aesthetics
  • Increased plaque retention
  • Occlusal instability

Understanding the correct minimum crown preparation depth is essential for achieving predictable restorative success.


Why Crown Preparation Depth Matters

Modern dental crown materials are engineered to work at specific thicknesses.

These thicknesses are not random.

Dental material manufacturers spend years testing:

  • Fracture resistance
  • Flexural strength
  • Occlusal loading
  • Thermal cycling
  • Bonding performance
  • Fatigue resistance

Based on this research, manufacturers provide minimum material thickness guidelines that clinicians and laboratories are expected to follow.

If these minimum thicknesses are not achieved, the restoration may become significantly weaker and more prone to failure.

In fact, many porcelain manufacturers specifically state that:

If the minimum material thickness is not achieved, their product warranty becomes void.

Many dental laboratories will also refuse to warranty restorations produced on insufficient preparations because the preparation design does not meet the material manufacturer’s specifications.


The Biggest Mistake in Crown Preparations

One of the most common clinical mistakes is insufficient occlusal reduction.

This often occurs because clinicians worry about:

  • Pulpal exposure
  • Over-preparation
  • Post-operative sensitivity
  • Excessive dentine removal

While preserving tooth structure is important, insufficient reduction can create equally serious problems.

When there is inadequate reduction, the technician has only two options:

1. Make the Crown Too Thin

This increases the risk of:

  • Porcelain fracture
  • Chipping
  • Occlusal wear
  • Restoration failure

2. Overbulk the Crown

This creates:

  • Poor occlusion
  • Bulky contours
  • Poor emergence profile
  • Gingival irritation
  • Occlusal interferences
  • Unnatural aesthetics

Neither outcome is ideal.


Minimum Crown Preparation Depth Guide

Below is a useful guide for minimum reduction depths required for common crown materials.


Porcelain Fused to Metal (PFM) Crowns

PFM restorations require space for both:

  • Metal framework
  • Porcelain layering

Minimum Thickness Requirements

Metal Framework Minimum:

0.3MM

Porcelain Minimum:

1.0MM

Total Minimum Reduction:

1.3MM

This is considered the absolute minimum.

Many porcelain manufacturers actually recommend closer to:

  • 1.5MM total reduction

particularly in areas of heavy occlusal loading.


Porcelain Fused to Zirconia Crowns

PFZ restorations require slightly greater reduction because zirconia frameworks are generally thicker than traditional metal frameworks.

Minimum Thickness Requirements

Zirconia Framework Minimum:

  • 0.4MM anterior
  • 0.5MM posterior

Porcelain Minimum:

1.0MM

Total Minimum Reduction:

  • 1.4MM anterior
  • 1.5MM posterior

Again, these are minimum values.

Insufficient reduction can lead to:

  • Porcelain chipping
  • Framework show-through
  • Poor translucency
  • Weak restorations

Full Gold Crowns and Metal Occlusals

Gold crowns and full metal restorations can often function successfully with less reduction than ceramics due to the superior mechanical properties of metal.

However, even full metal restorations require adequate thickness.

Minimum Thickness Requirements

Framework Minimum:

0.5MM

Anything less than 0.5MM has been shown in many modern studies to increase the risk of long-term restorative failure.

Thin metal restorations may suffer from:

  • Distortion
  • Occlusal wear
  • Perforation
  • Structural fatigue

Why a 2MM Depth Cut Bur Is Recommended

For zirconia and PFM restorations, many clinicians now prefer using a 2MM depth cut bur during the initial preparation phase.

This allows clinicians to establish controlled and accurate depth grooves before completing the full reduction.

The benefits of using a depth cutting bur include:

  • Controlled tooth reduction
  • More predictable preparation depth
  • Reduced under-preparation
  • Better occlusal clearance
  • Improved restorative space
  • Consistent ceramic thickness
  • Improved crown longevity

Depth cutting burs help remove the guesswork from crown preparations.


The Frank Dental DM-KIT Depth Marking Kit

One of the most effective ways to improve preparation accuracy is the use of a dedicated depth marking system such as the Frank Dental DM-KIT available from Crown Dental Burs.

The Frank Dental DM-KIT has been specifically designed to help clinicians achieve predictable and accurate tooth reduction for both veneers and crown preparations.

The kit contains a carefully selected range of depth marking burs including:

Veneer Depth Markers

These are ideal for:

  • Minimal preparation veneers
  • Additive dentistry
  • Porcelain veneers
  • Composite veneers
  • Smile design preparations
  • Controlled facial reduction

The veneer depth markers help clinicians maintain conservative preparations while still achieving sufficient restorative space for ceramics.


Crown Preparation Depth Markers Included in the DM-KIT

The Frank Dental DM-KIT also includes four dedicated crown preparation depth marking burs:

This allows clinicians to accurately prepare for:

  • Full gold crowns
  • PFM crowns
  • Zirconia crowns
  • Lithium disilicate crowns
  • Monolithic ceramic restorations
  • CAD/CAM crowns

By using sequential depth markers, clinicians can create highly accurate depth grooves prior to full reduction.

This dramatically improves:

  • Reduction consistency
  • Crown thickness predictability
  • Occlusal clearance
  • Restoration strength
  • Preparation accuracy

Why Depth Markers Improve Crown Preparations

Many clinicians visually estimate reduction depth, but even experienced operators can underestimate the amount of space required for modern ceramics.

Depth markers provide objective guidance.

This helps reduce:

  • Guesswork
  • Under-preparation
  • Overcontoured restorations
  • Laboratory remakes
  • Chairside adjustments

Using dedicated depth cutting burs can also improve communication between:

  • Clinicians
  • Dental laboratories
  • CAD/CAM designers
  • Intraoral scanning workflows

“Won’t I Cut Into the Pulp?”

This is one of the biggest concerns clinicians initially have when increasing crown preparation depth.

Interestingly, many dentists who begin using 2MM depth cutting techniques quickly realise:

They rarely come close to the pulp.

Why?

Because natural tooth anatomy often provides more coronal tooth structure than many clinicians initially perceive.

The biggest issue is often not over-reduction — but under-reduction.

Many clinicians are surprised to discover how frequently crowns are returned from laboratories with comments such as:

  • “Insufficient occlusal clearance”
  • “Minimal material thickness”
  • “Not enough reduction”
  • “Occlusal space inadequate”

Using proper depth cuts dramatically reduces these problems.


The Importance of Bite Guides

Another highly valuable tool during crown preparation is the use of bite guides and occlusal clearance guides.

These are essential for verifying that sufficient reduction has been achieved dynamically — not just statically.

Bite guides help ensure:

  • Adequate interocclusal space
  • Proper functional clearance
  • Correct excursive clearance
  • Appropriate protrusive clearance
  • Balanced occlusion

Clinicians should ask patients to perform:

  • Lateral excursions
  • Protrusive movements
  • Functional movements

This helps identify areas where additional reduction may still be required.


Why Under-Prepared Crowns Fail

One of the most common reasons crowns fail prematurely is inadequate preparation depth.

Under-prepared crowns place enormous stress on restorative materials.

This can result in:

  • Porcelain fracture
  • Zirconia chipping
  • Loss of glaze
  • Cement failure
  • Marginal leakage
  • Occlusal instability

Ceramics require adequate bulk to distribute forces properly.

When ceramics are too thin, stress becomes concentrated in smaller areas, increasing fracture risk significantly.


Overcontoured Crowns and Periodontal Problems

Insufficient reduction also forces technicians to bulk out the crown contours.

This often creates overcontoured restorations.

Overcontoured crowns are associated with:

  • Plaque accumulation
  • Gingival inflammation
  • Bleeding margins
  • Poor floss access
  • Periodontal irritation
  • Food trapping

The emergence profile becomes unnatural because the restoration has insufficient space to transition naturally from the preparation margin.


The Relationship Between Crown Thickness and Aesthetics

Ceramic thickness is critical not only for strength, but also aesthetics.

If ceramic restorations are too thin, problems may include:

  • Reduced translucency
  • Grey appearance
  • Poor shade matching
  • Limited depth of colour
  • Opaque appearance

Adequate reduction allows technicians to layer ceramics properly and create natural aesthetics.

This is especially important for:

  • Anterior zirconia crowns
  • E.max restorations
  • Cosmetic smile cases
  • High translucency ceramics

Why Modern Zirconia Still Needs Proper Reduction

A common misconception is that modern zirconia crowns require very little reduction because zirconia is extremely strong.

While zirconia does have high flexural strength, it still requires adequate reduction for:

  • Occlusal anatomy
  • Connector strength
  • Aesthetic layering
  • Structural durability
  • Proper contouring

Insufficient reduction often leads to flat, unaesthetic and overcontoured zirconia crowns.


Occlusal Reduction Is Critical

Occlusal clearance is often the most under-prepared area of crown preparations.

Clinicians may visually assume enough reduction has occurred when in reality:

  • Cuspal anatomy remains too high
  • Functional cusps lack clearance
  • Excursive pathways are inadequate

This is why depth cutting burs and bite guides are so valuable.

They help objectively confirm reduction depth.


Benefits of Proper Crown Reduction

When correct crown preparation depth is achieved, clinicians benefit from:

  • Stronger restorations
  • Improved occlusion
  • Better crown fit
  • Better aesthetics
  • Reduced laboratory adjustments
  • Improved ceramic longevity
  • Healthier gingival tissues
  • Reduced remake rates
  • Improved patient satisfaction

Final Thoughts

Understanding minimum crown preparation depth is essential for every clinician providing indirect restorations.

While conservative dentistry is important, under-preparation can create significant restorative complications that compromise:

  • Crown strength
  • Crown fit
  • Aesthetics
  • Periodontal health
  • Long-term success

As a general guideline:

PFM Crowns:

Minimum 1.3MM reduction

Zirconia Crowns:

Minimum 1.4–1.5MM reduction

Full Gold Crowns:

Minimum 0.5MM reduction

Using dedicated systems such as the Frank Dental DM-KIT depth marking kit from Crown Dental Burs allows clinicians to prepare teeth more predictably while avoiding insufficient reduction.

The goal is not simply to preserve tooth structure.

The goal is to preserve tooth structure while still providing enough restorative space for modern crown materials to function successfully long term.

In restorative dentistry, proper preparation depth remains one of the most important foundations of crown success.

Posted on

Top Tip for Better Crown Preparations: Why Increasing the Bur Diameter During Refinement Helps Prevent J-Margins and Gullies

Top Tip for Better Crown Preparations:

Why Increasing the Bur Diameter During Refinement Helps Prevent J-Margins and Gullies

Achieving a precise and biologically respectful crown preparation is one of the most important foundations of long-term restorative success. Even with modern digital dentistry, CAD/CAM workflows and advanced ceramic materials, the quality of the margin preparation still determines how accurately a crown fits, how well the restoration seals, and how long the treatment will survive clinically.

One common problem many clinicians encounter during crown preparation is the accidental creation of a J-margin, sometimes referred to as a gully margin, particularly when using a parallel chamfer round end bur.

Interestingly, experienced clinicians often instinctively refine their preparations using a slightly larger diameter parallel chamfer bur during the finishing stages. While this may appear to simply improve visibility or speed, the real reason is far more important:

Increasing the bur diameter during refinement helps prevent the creation of J-margins and marginal gullies.

Understanding why this happens — and the consequences of poorly formed margins — can dramatically improve crown fit, impression accuracy, restoration longevity and periodontal health.


The Recommended Clinical Technique

A highly effective approach when preparing crowns is to begin the preparation using a medium grit parallel chamfer bur such as the Frank Dental D.881.012.G.FG crown preparation bur before refining and smoothing the margins with a finer and slightly larger diameter bur such as the Frank Dental D.881.014.F.FG.

The reason many experienced clinicians increase the bur diameter during refinement is simple:

A larger diameter finishing bur helps prevent the bur from dropping into the cervical margin and creating a J-margin or gully.

This simple adjustment can dramatically improve:

  • Margin clarity
  • Crown fit
  • Digital scan accuracy
  • Emergence profile
  • Ceramic support
  • Long-term restorative success

Initial Crown Preparation with the Frank Dental D.881.012.G.FG

The Frank Dental D.881.012.G.FG parallel chamfer round end bur is an excellent choice for initial crown preparation.

The 1.2mm diameter allows clinicians to:

  • Create controlled axial reduction
  • Produce a conservative chamfer margin
  • Maintain excellent visibility
  • Establish smooth preparation geometry
  • Prepare zirconia, lithium disilicate and PFM restorations

The medium grit diamond coating provides efficient tooth reduction while maintaining excellent tactile control.

This type of crown preparation bur is particularly useful for:

  • Zirconia crown preparations
  • Monolithic ceramic crowns
  • E.max crown preparations
  • Full coverage restorations
  • CAD/CAM crown preparations
  • Conservative posterior crowns

The parallel-sided geometry helps maintain excellent path of insertion control while the rounded end creates a smooth chamfer finish line that reduces stress concentration within ceramic restorations.


Refining the Crown Preparation with the Frank Dental D.881.014.F.FG

After the initial preparation has been established, many experienced restorative clinicians will switch to a larger and finer bur such as the Frank Dental D.881.014.F.FG for the refinement stage.

This is an important restorative tip that is often overlooked.

The larger 1.4mm diameter creates several clinical advantages:

  • Prevents overcutting the cervical margin
  • Reduces the risk of J-margin formation
  • Produces smoother finish lines
  • Improves preparation continuity
  • Creates a more uniform chamfer width
  • Helps refine axial wall geometry

The finer grit also helps smooth:

  • Diamond scratches
  • Preparation irregularities
  • Minor surface defects
  • Rough margin areas

This creates a cleaner and more readable finish line for both conventional impressions and digital intraoral scanners.


What Is a Parallel Chamfer Round End Bur?

A parallel chamfer round end bur is one of the most widely used crown preparation burs in restorative dentistry.

These burs are particularly popular for:

  • Zirconia crown preparations
  • Full gold crowns
  • Monolithic ceramic restorations
  • PFM restorations
  • CAD/CAM preparations
  • Conservative crown preparations

The design features:

  • Parallel or near-parallel sides
  • Rounded internal edge
  • Chamfer margin geometry
  • Controlled axial reduction
  • Smooth margin transitions

The rounded edge design is especially important because it reduces stress concentration within ceramic restorations and produces a smoother internal line angle.


What Is a J-Margin or Gully Margin?

A J-margin occurs when the margin preparation curves outward into a lip or unsupported enamel ledge rather than forming a clean, smooth chamfer.

Instead of a clear finish line, the preparation develops:

  • A hooked margin
  • A concave ditch
  • A saucer-shaped ledge
  • An unsupported lip
  • A marginal gully

When viewed in cross-section, the shape resembles the letter “J”, which is where the term originates.

This typically occurs during refinement of the preparation margin when the clinician inadvertently tilts or overworks the bur at the cervical margin.

The result is a margin that may appear smooth visually but is actually biologically and mechanically compromised.


Why Do J-Margins Occur?

J-margins are commonly created when clinicians attempt to refine or smooth the margin using the same small diameter bur used during initial reduction.

As the bur becomes partially submerged into the preparation, operators may unintentionally:

  • Roll the bur outward
  • Tilt the bur excessively
  • Drop the handpiece angle
  • Apply lateral pressure
  • Over-refine the margin

Smaller diameter burs are particularly prone to this problem because their narrower profile allows them to sink deeper into the preparation margin.

This can create:

  • Overcut margins
  • Concave cervical areas
  • Thin enamel lips
  • Unsupported tooth structure
  • Irregular finishing lines

How a Larger Bur Prevents J-Margins

A larger diameter parallel chamfer bur contacts a wider surface area of the tooth simultaneously.

This wider contact helps maintain:

  • Correct handpiece orientation
  • Proper axial wall alignment
  • Controlled margin geometry
  • Uniform reduction depth

Because the bur cannot easily “dip” into the cervical margin, it is less likely to create:

  • Marginal lips
  • Concavities
  • Undercuts
  • Unsupported enamel

The result is a cleaner, smoother and more ideal restorative finish line.


Why J-Margins Are a Major Clinical Problem

Some clinicians underestimate the significance of J-margins because they can appear relatively minor clinically.

However, poorly formed margins can create substantial restorative complications.


1. Poor Crown Fit

One of the biggest problems with J-margin preparations is inaccurate crown adaptation.

Modern restorations rely on:

  • Clearly readable margins
  • Smooth finish lines
  • Consistent preparation geometry

A gully margin creates ambiguity for:

  • Intraoral scanners
  • Impression materials
  • Dental technicians
  • CAD/CAM software

This can lead to restorations with:

  • Open margins
  • Overextended margins
  • Poor seating
  • Internal binding
  • Marginal discrepancies

Even small marginal inaccuracies can significantly reduce restoration longevity.


2. Increased Risk of Cement Washout

When a crown does not fit accurately due to irregular preparation margins, cement thickness becomes inconsistent.

Areas with excessive cement thickness are more vulnerable to:

  • Cement dissolution
  • Marginal leakage
  • Microleakage
  • Bacterial penetration

Over time this can lead to:

  • Secondary caries
  • Crown failure
  • Sensitivity
  • Recurrent decay

3. Unsupported Enamel Can Fracture

One of the most dangerous consequences of a J-margin is the creation of unsupported enamel.

Unsupported enamel is weak and prone to fracture either:

  • During impression taking
  • During crown seating
  • Under occlusal function
  • During temporary crown removal

If the enamel fractures after the restoration has been fabricated, the crown margin may no longer fit accurately.

This can require:

  • Crown remake
  • Additional tooth reduction
  • Emergency adjustments
  • Compromised retention

4. Difficulties for Digital Scanners

Digital dentistry has dramatically increased the importance of smooth preparation margins.

Intraoral scanners struggle to accurately capture:

  • Deep gullies
  • Undercuts
  • Sharp cervical defects
  • Irregular finish lines

Poor scanning data can produce:

  • Distorted margins
  • Poor crown adaptation
  • Milling inaccuracies
  • Incorrect restoration contours

Clean chamfer margins are significantly easier for scanners to capture accurately.


5. Overcontoured Crown Margins

When technicians attempt to compensate for unclear margins, restorations often become overcontoured cervically.

This can lead to:

  • Plaque retention
  • Gingival inflammation
  • Periodontal irritation
  • Difficult oral hygiene
  • Bleeding margins

Ultimately this compromises long-term periodontal stability.


6. Increased Stress Within Ceramic Restorations

Irregular preparations can create uneven ceramic thickness.

Ceramics perform best when supported by:

  • Smooth preparation geometry
  • Rounded internal angles
  • Uniform reduction

J-margins can create stress concentration areas within ceramics which increase the risk of:

  • Chipping
  • Fracture
  • Crack propagation
  • Restoration failure

Why Margin Quality Matters More in Modern Digital Dentistry

As dentistry becomes increasingly digital and minimally invasive, preparation accuracy becomes even more critical.

Today’s restorations rely on:

  • High accuracy intraoral scanning
  • CAD/CAM milling precision
  • Thin monolithic ceramics
  • Adhesive bonding protocols
  • Conservative preparations

Poor preparation margins can compromise even the most advanced restorative workflows.

This is why many clinicians are refining their crown preparation techniques by using dedicated finishing burs such as the Frank Dental D.881.014.F.FG after initial reduction with the D.881.012.G.FG.

The result is:

  • Cleaner crown margins
  • Improved scan readability
  • Better fitting restorations
  • Healthier soft tissues
  • More predictable cementation
  • Longer lasting crowns

Clinical Technique Tips to Avoid J-Margins

1. Start with the D.881.012.G.FG for Controlled Reduction

The smaller diameter provides excellent control during initial preparation and depth management.


2. Refine with the D.881.014.F.FG

The slightly larger diameter helps prevent cervical ditching and creates smoother finish lines.


3. Maintain Proper Bur Orientation

Keep the bur parallel to the path of insertion.

Avoid rolling or tipping the bur cervically.


4. Use Light Pressure

Allow the bur to cut efficiently rather than forcing the instrument.


5. Use Long Sweeping Motions

Avoid aggressive spot refinement directly at the margin.

Smooth continuous movements create cleaner preparations.


6. Check Margins Under Magnification

Magnification helps identify:

  • Marginal lips
  • Gullies
  • Undercuts
  • Unsupported enamel

before scanning or impression taking.


Final Thoughts

A seemingly small adjustment — increasing the bur diameter during the refinement stage of a crown preparation — can have a major impact on restorative success.

By beginning with the Frank Dental D.881.012.G.FG for controlled preparation and refining with the larger Frank Dental D.881.014.F.FG, clinicians can significantly reduce the risk of creating:

  • J-margins
  • Cervical gullies
  • Unsupported enamel
  • Irregular finish lines

This results in:

  • Better crown fit
  • Improved digital scans
  • Healthier periodontal outcomes
  • Stronger ceramic support
  • More predictable restorative success

In modern restorative dentistry, preparation quality remains everything.

The crown can only ever be as good as the margin it sits on.

Posted on

Frank Dental D.835 vs D.835KR – Understanding the Difference Between Square Edge & Round Edge Straight Fissure Cavity Preparation Burs

When dentists search for a straight fissure diamond bur, cavity preparation bur or composite preparation bur, one of the most common questions is:

Should you use a square edge straight fissure bur or a round edge straight fissure bur?

Understanding the difference between the Frank Dental D.835 Straight Fissure Square Edge Diamond Bur and the Frank Dental D.835KR Straight Fissure Round Edge Diamond Bur is extremely important in modern restorative dentistry because the geometry of the bur directly influences cavity design, stress distribution, restorative adaptation and long-term restoration success.

Manufactured in Germany by Frank Dental, both the D.835 and D.835KR are premium-quality parallel-sided cavity preparation burs used widely in operative dentistry and restorative procedures. While they may initially appear very similar, the design of the cutting edge creates significant differences in how the cavity preparation behaves clinically.


What Is a Straight Fissure Bur?

A straight fissure bur is a parallel-sided diamond bur designed to create defined cavity walls, flat pulpal floors and controlled preparation geometry.

Unlike pear-shaped burs, which naturally create rounded cavity forms, straight fissure burs create:

  • Parallel cavity walls
  • Defined preparation outlines
  • Controlled cavity depth
  • Structured box forms
  • Precise axial wall geometry

This makes straight fissure burs extremely popular in restorative dentistry, especially for:

  • Composite restorations
  • Posterior cavity preparations
  • Proximal box preparations
  • Operative dentistry
  • Adhesive restorative procedures

The main difference between the Frank Dental D.835 and D.835KR is the design of the cutting edge.


Frank Dental D.835 Straight Fissure Square Edge Bur

The Frank Dental D.835 Straight Fissure Square Edge Diamond Bur features:

  • Parallel straight sides
  • A flat cutting end
  • Sharp internal preparation angles
  • Defined cavity wall geometry

The square edge design allows dentists to create cavity preparations with:

  • Flat pulpal floors
  • Sharp cavosurface definition
  • Highly defined box forms
  • Precise cavity wall alignment

The D.835 is commonly used for:

  • Class I cavity preparations
  • Class II cavity preparations
  • Posterior composite restorations
  • Proximal box preparation
  • Operative dentistry procedures
  • Structured cavity geometry

Dentists searching online for:

  • Square edge cavity preparation bur
  • Straight fissure square edge bur
  • Flat end diamond bur
  • Parallel-sided cavity bur
  • Composite cavity preparation bur

often require burs capable of producing highly controlled and clearly defined cavity walls.


Advantages of the Frank Dental D.835 Square Edge Bur

The square edge design offers several important advantages in operative dentistry.

Advantages Include:

  • Excellent wall definition
  • Controlled cavity geometry
  • Flat pulpal floor creation
  • Accurate box forms
  • Defined cavity outline
  • Excellent visibility during preparation
  • Efficient enamel and dentine cutting
  • Controlled cavity depth

The D.835 is particularly useful when clinicians require precise cavity geometry and strong preparation control.

The flat-ended design also helps maintain consistent preparation depth, which can improve restorative adaptation and occlusal balance.


Potential Problems with Square Internal Angles

Although the D.835 square edge bur provides excellent cavity wall control, sharp internal line angles can create stress concentration areas inside restorations.

This becomes especially important in:

  • Large posterior composite restorations
  • Ceramic inlays
  • Ceramic onlays
  • Adhesive restorations
  • Thin restorative materials

Sharp internal corners concentrate occlusal forces into small areas within the restoration. Over time, this may contribute to:

  • Composite fracture
  • Marginal breakdown
  • Stress cracking
  • Ceramic fracture
  • Restoration debonding
  • Microleakage
  • Reduced restoration longevity

This is where the Frank Dental D.835KR round edge bur becomes highly important.


Frank Dental D.835KR Straight Fissure Round Edge Bur

The Frank Dental D.835KR Straight Fissure Round Edge Diamond Bur features:

  • Parallel straight sides
  • Rounded internal cutting edge
  • Smooth transition angles
  • Reduced stress concentration geometry

The “KR” design creates rounded internal line angles during cavity preparation instead of sharp internal corners.

This produces cavity forms with:

  • Smoother internal geometry
  • Rounded cavity transitions
  • Improved stress distribution
  • Reduced crack initiation points
  • More adhesive-friendly cavity design

Dentists frequently search online for:

  • Round edge cavity preparation bur
  • Straight fissure round edge bur
  • Adhesive dentistry bur
  • Composite preparation bur
  • Diamond bur for posterior composites
  • Restorative dentistry diamond bur

because modern adhesive restorative dentistry increasingly favours rounded internal cavity geometry.


Why Rounded Internal Line Angles Matter

One of the most important concepts in restorative dentistry is stress distribution.

When a patient bites or chews, occlusal forces travel through the restoration and tooth structure. Sharp internal cavity corners can concentrate these forces into very small areas.

This creates:

  • Stress concentration points
  • Crack initiation sites
  • Weak areas within restorations

Rounded internal line angles created by the D.835KR help distribute these forces more evenly throughout the restoration.

This can improve:

  • Composite longevity
  • Marginal integrity
  • Fracture resistance
  • Restoration durability
  • Adhesive bonding performance

The D.835KR is therefore particularly beneficial for:

  • Large posterior composites
  • Adhesive restorations
  • Biomimetic dentistry
  • Minimally invasive dentistry
  • Ceramic inlays and onlays

Square Edge vs Round Edge – Which Is Better?

Neither bur is universally “better.” The correct bur depends on the clinical situation and restorative objectives.

The Frank Dental D.835 Square Edge Bur Is Best For:

  • Defined cavity geometry
  • Structured box forms
  • Flat pulpal floors
  • Controlled cavity depth
  • Operative dentistry precision
  • Traditional cavity preparations

The Frank Dental D.835KR Round Edge Bur Is Best For:

  • Adhesive restorative dentistry
  • Composite restorations
  • Stress reduction within restorations
  • Rounded internal cavity geometry
  • Biomimetic restorative techniques
  • Minimally invasive dentistry

Many clinicians use both burs during restorative procedures depending on the stage of cavity preparation and restorative material being used.


Why Bur Selection Matters in Composite Dentistry

Modern composite materials have excellent strength and aesthetics, but cavity design still significantly affects restoration success.

Poor preparation geometry may contribute to:

  • Composite fracture
  • Marginal leakage
  • Weak contact points
  • Restoration debonding
  • Occlusal instability
  • Reduced restoration longevity

Selecting the correct bur helps optimise:

  • Composite adaptation
  • Stress distribution
  • Marginal seal
  • Occlusal stability
  • Restoration strength

The Frank Dental D.835 and D.835KR allow dentists to choose the preparation geometry most appropriate for the clinical situation.


Parallel-Sided Design – Why It Is Important

Both the D.835 and D.835KR feature parallel straight sides rather than tapered walls.

Parallel-sided burs provide:

  • Controlled cavity wall geometry
  • Accurate preparation dimensions
  • Improved cavity consistency
  • Excellent box form definition
  • Predictable restorative space

This makes both burs highly effective for posterior restorative dentistry and operative procedures.

Dentists searching online for:

  • Parallel-sided cavity preparation bur
  • Straight-sided diamond bur
  • Restorative dentistry burs
  • Parallel wall composite bur

often require burs capable of producing highly controlled cavity geometry.


German Precision Diamond Technology

Frank Dental burs are manufactured in Germany using premium-quality natural diamond particles for:

  • Smooth cutting performance
  • Reduced vibration
  • Efficient enamel reduction
  • Controlled dentine cutting
  • Excellent tactile feedback
  • Long-lasting cutting efficiency
  • Consistent grit distribution

The precision-engineered diamond coating ensures predictable preparation performance throughout restorative procedures.


Which Bur Should You Choose?

The choice between the Frank Dental D.835 and D.835KR depends on the desired cavity geometry and restorative philosophy.

Choose the D.835 Square Edge Bur If You Want:

  • Highly defined cavity walls
  • Structured cavity geometry
  • Flat pulpal floors
  • Precise box form preparation

Choose the D.835KR Round Edge Bur If You Want:

  • Reduced stress concentration
  • Rounded internal line angles
  • Improved force distribution
  • Adhesive-friendly cavity geometry

Many modern clinicians favour rounded internal cavity geometry for large composite restorations and adhesive procedures because of the potential reduction in stress concentration and improved restoration longevity.


Final Thoughts

The Frank Dental D.835 Straight Fissure Square Edge Bur and the Frank Dental D.835KR Straight Fissure Round Edge Bur are both highly effective cavity preparation burs for restorative dentistry.

While both feature parallel-sided straight fissure geometry, the design of the cutting edge significantly changes how the cavity behaves mechanically and how restorative forces are distributed.

For dentists searching for premium-quality:

  • Straight fissure cavity preparation burs
  • Square edge diamond burs
  • Round edge cavity preparation burs
  • Composite preparation burs
  • Parallel-sided diamond burs
  • Operative dentistry burs
  • Restorative dentistry burs
  • Frank Dental burs UK

the D.835 and D.835KR provide clinicians with precision-engineered solutions for modern restorative dentistry and predictable composite preparation workflows.

Posted on

Why Dentists Are Switching to the DentaSonic IPR System for Faster, Safer and More Predictable Interproximal Reduction

The Evolution of IPR in Modern Dentistry

Interproximal reduction (IPR) has become an essential procedure in modern orthodontics, clear aligner therapy and minimally invasive dentistry. However, many clinicians still rely on manual abrasive strips or traditional disc systems that can be time-consuming, difficult to control and uncomfortable for patients.

The IPR System has been designed to change this completely — delivering a faster, safer and more precise approach to enamel reduction.

Following clinical feedback from dentists using the system in practice and on educational courses, the DentaSonic system is quickly becoming one of the most talked-about mechanical IPR systems available today.


What Makes the DentaSonic IPR System Different?

One of the biggest advantages clinicians immediately notice with the DentaSonic handpiece is the level of precision and control during treatment.

Unlike manual strips which can feel inconsistent and labour intensive, the DentaSonic system provides:

  • Controlled and accurate enamel reduction
  • Faster treatment times
  • Excellent visibility
  • Predictable polishing and finishing
  • Improved patient comfort
  • Increased soft tissue safety

The handpiece feels exceptionally stable during use, allowing clinicians to carry out highly controlled IPR procedures with confidence — particularly when performing minimal reductions of 0.2 mm to 0.3 mm.


Significant Time Savings Compared to Manual IPR

For many dentists and orthodontists, one of the most frustrating parts of traditional IPR is the amount of chair time required.

Manual abrasive strips can be slow, physically demanding and difficult to use in posterior areas.

The DentaSonic IPR system dramatically reduces treatment time by allowing clinicians to perform enamel reduction efficiently while maintaining excellent control.

This not only improves workflow efficiency within the practice but also creates a smoother and more comfortable patient experience.

For busy clear aligner clinics and orthodontic practices, reducing treatment time while maintaining accuracy is a major clinical and financial advantage.


Improved Soft Tissue Safety and Patient Comfort

A major concern with many rotary IPR systems is accidental trauma to gingival tissues.

One of the standout features repeatedly highlighted by clinicians using the DentaSonic system is its safety around soft tissues and gingiva.

The system has been praised for its ability to safely perform IPR with minimal risk of soft tissue trauma, helping increase patient confidence during treatment.

This is particularly important for:

  • Nervous patients
  • Younger orthodontic patients
  • Minimal reduction cases
  • Posterior interproximal areas

By improving both clinician confidence and patient comfort, the DentaSonic system helps create a more predictable and stress-free IPR procedure.


Excellent Polishing and Surface Finishing

Achieving smooth, polished enamel surfaces after IPR is critical for long-term clinical success.

The DentaSonic polishing burs allow clinicians to quickly create highly polished and beautifully contoured interproximal surfaces after reduction.

A smoother enamel finish can help:

  • Improve patient comfort
  • Reduce plaque retention
  • Enhance aesthetics
  • Create more natural interproximal contours

The ability to complete both reduction and polishing efficiently within one workflow makes the DentaSonic system an ideal solution for modern orthodontic and restorative dentistry.


Easy Access Even in Posterior Areas

Although the assembled handpiece may initially appear larger than traditional systems, clinicians consistently report that it is surprisingly manoeuvrable in practice.

This is particularly beneficial when carrying out limited IPR in posterior regions where access can often be difficult using conventional systems.

The stable design of the handpiece helps clinicians maintain precision even in challenging clinical situations.


When Should Manual Strips Still Be Used?

As with any mechanical IPR system, correct case selection remains important.

In cases involving heavily overlapping teeth or extremely tight contacts, initial separation with manual abrasive strips may still be beneficial before introducing the mechanical bur.

However, once access has been established, the DentaSonic system allows clinicians to complete the procedure significantly faster and more predictably than manual methods alone.


Why More Dentists Are Choosing the DentaSonic IPR System

The DentaSonic system combines:

  • Precision
  • Efficiency
  • Safety
  • Patient comfort
  • Excellent polishing
  • Predictable clinical outcomes

As clear aligner therapy and minimally invasive orthodontics continue to grow, clinicians are increasingly searching for reliable and efficient IPR systems that improve workflow without compromising control.

The DentaSonic mechanical IPR system delivers exactly that.


Order the DentaSonic IPR System Online

Looking for a faster, safer and more predictable approach to interproximal reduction?

Discover the benefits of the IPR system and upgrade your orthodontic workflow today.

Ideal for:

  • Clear aligner treatment
  • Orthodontics
  • Cosmetic dentistry
  • Restorative finishing
  • Minimal enamel reduction procedures

Browse the full DentaSonic range online today.


Customer Testimonial by Dr Ahmed AlKaaky (Manchester)

“The DENTASONIC IPR handpiece delivers a precise, controlled and highly efficient IPR experience. The biggest advantage for me was the significant time saving compared to conventional methods.

What stood out most was the safety around soft tissues and gingiva, greatly improving patient comfort and confidence during treatment. The polishing burs also create beautifully polished and well-contoured surfaces very quickly.

Despite initially appearing large, the handpiece is surprisingly easy to manoeuvre, even in posterior areas where minimal IPR can be challenging.

Overall, I am extremely pleased with the product and will be promoting it during our courses and clinical demonstrations.”